
Better deliverability, more professional-looking email address, whatever your reason might be for switching to Google Workspace (formerly G Suite), I’ll teach you how to set it up in just a few quick steps.
Ready?
Step 1: Go to Google Workspace
1. Go to Google Workspace – this is an affiliate link, so I get a few bucks at no extra cost to you if you use it. I don’t think it’s even enough for a cup of coffee, but whatever, I’ll still take it.
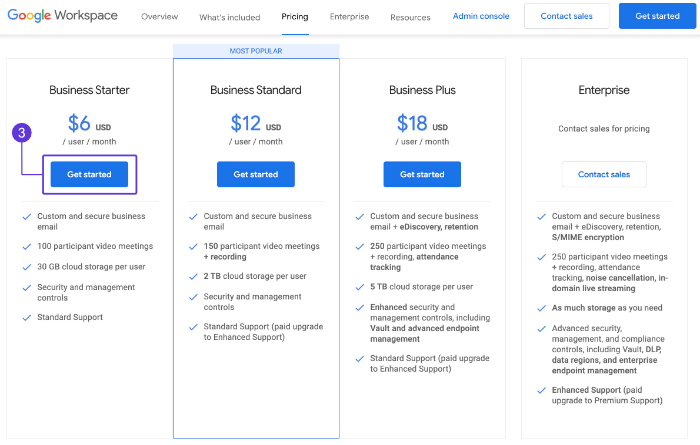
2. Choose your plan – the Business Starter should be enough if you’re just starting out.
3. Click “Get Started”
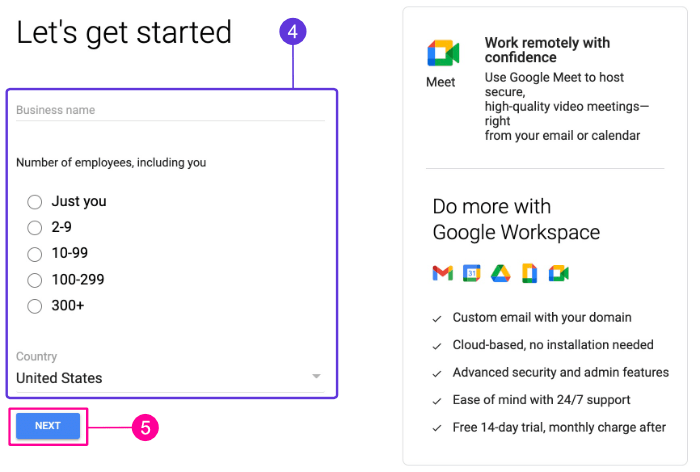
4. Fill out the required information
5. Click “Next”
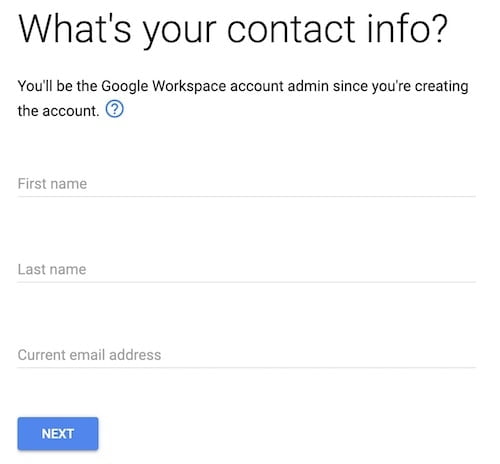
6. Enter your contact info. You can use your personal email address.
7. Click “Next”
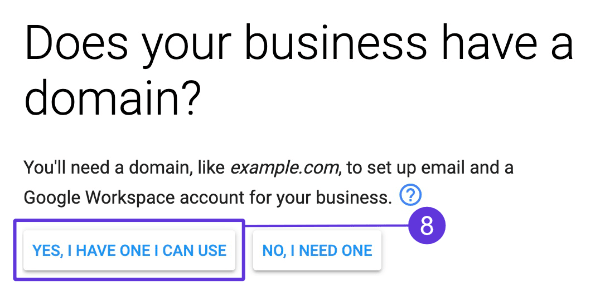
8. Select “Yes, I have one I can use” if you already have a domain name, if not, you’ll have to register one first.
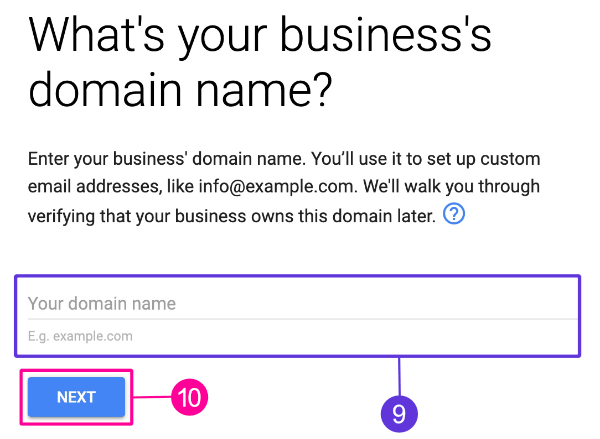
9. Enter your business’s domain name
10. Click “Next”
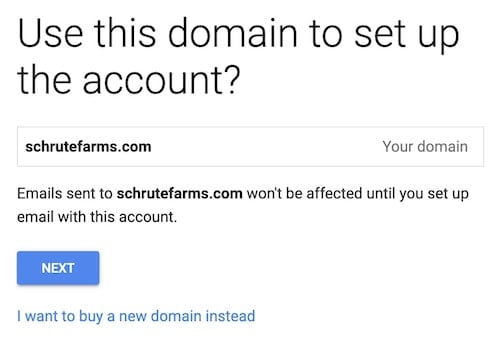
11. Make sure that the domain you entered is the one you want to use.
12. Click “Next”
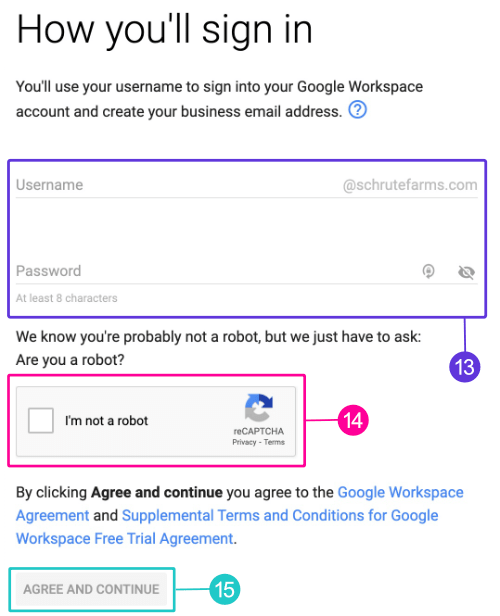
13. Create your account – the username you choose here will be your business’s email address by default (Username@DomainName.com), so keep that in mind when creating your account.
14. Check the reCAPTCHA box, unless you’re a robot?
15. Click “Agree and Continue”
Step 2: Verify Your Domain
This is the part where things get a little more technical. But don’t worry, if you know how to follow instructions, you’ll be more than okay.
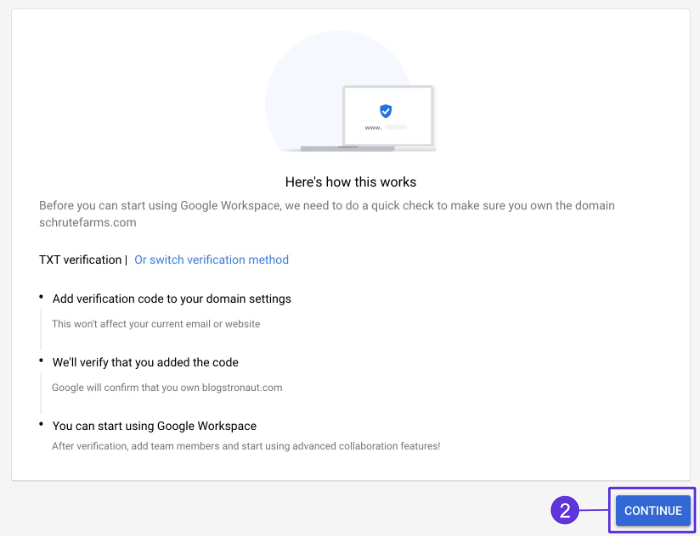
Once you’ve created your account and logged in to Google Workspace, you’ll be greeted with this screen:
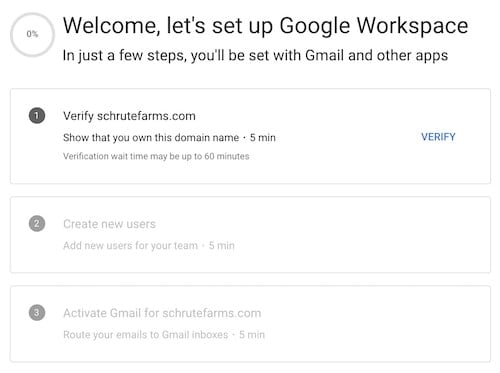
1. Click on “Verify”
2. Click “Continue” in the next screen
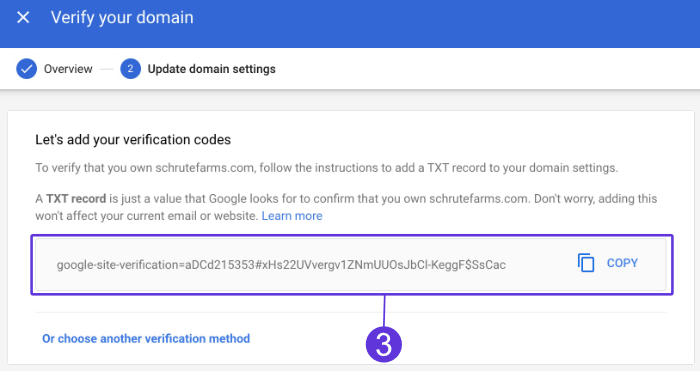
3. Copy the TXT record they give you
Now, how and where you add your TXT records will vary depending on where you’re hosting your domain name (not your web host, unless your web host is also hosting your domain name).
Google Workspace automatically scans and detects where your domain name is hosted and gives you specific instructions on how to add your TXT record.
For example, you can see how Google Workspace detected that my domain is hosted at Google Domains.
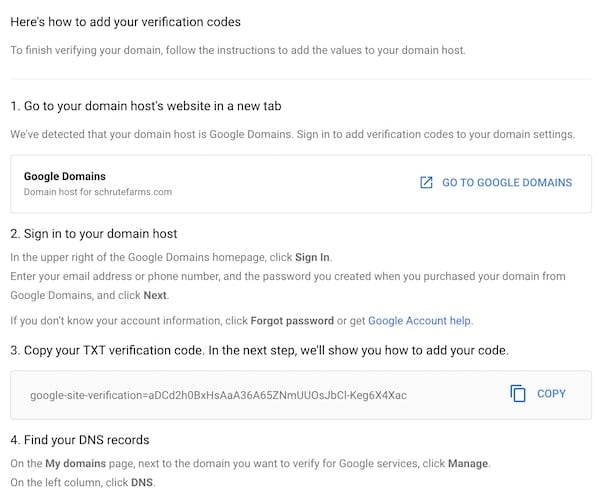
If you are here from my How to Start a Blog Guide, your domain name is probably hosted on Google Domains as well.
Their instructions are pretty clear, but in case you love mine better (thank you?), I’ll show you how to do it on this guide.
If your domain name is hosted on a different registrar, you’ll have to follow the instructions they give you.
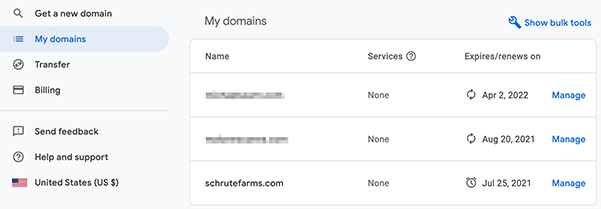
4. Log in to Google Domains
5. Select the domain you want to verify
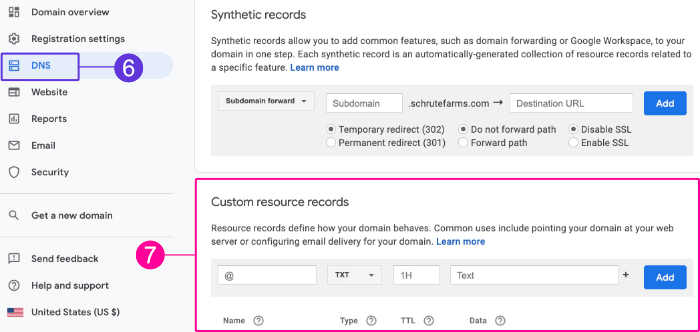
6. Click “DNS”
7. Scroll until you see the “Custom resource records” section
8. Enter “@” in the Name field
9. Select “TXT” from the Type dropdown menu
10. Enter “1H” in the TTL field
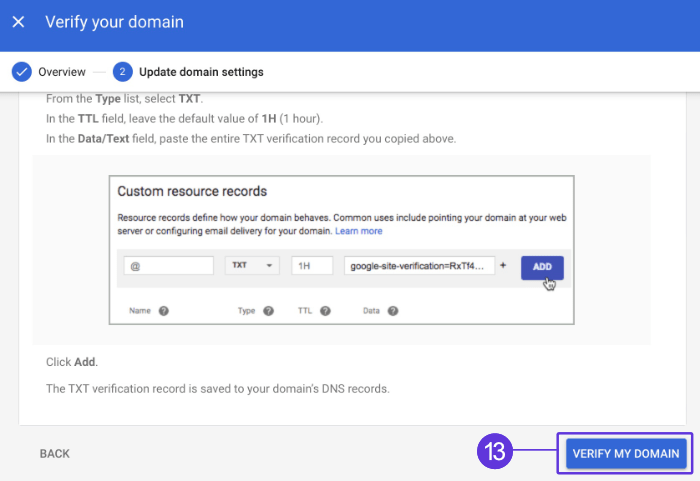
11. In the Data field, paste the TXT verification code from step 3
12. Click “Add”
13. Go back to Google Workspace and click “Verify My Domain”
That’s it, you should now see a checkmark confirming that your domain is verified.
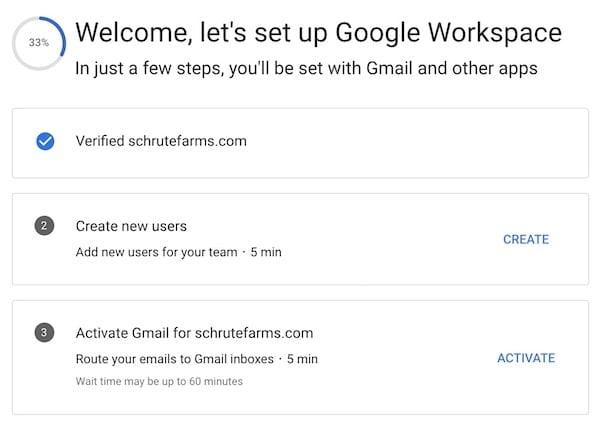
Step 3: Create New Users (Optional)
If you want to add new users to your Google Workspace account, you can simply click “Create” on the “Create new users” tab.
The process is really simple, all you have to do is add the new email addresses.
Step 4: Route Emails to Gmail Inboxes
The next step in setting up your Google Workspace (formerly G Suite) account is to activate Gmail for your domain.
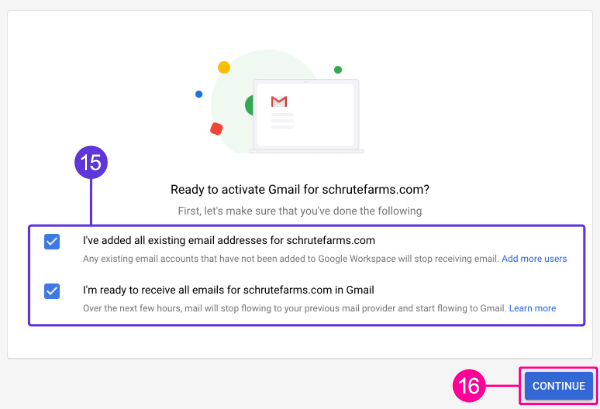
14. Click “Activate” on the “Activate Gmail for…” tab
15. Check both boxes (“I’ve added all existing email addresses” and “I’m ready to receive all emails in Gmail”)
16. Click “Continue”
The steps here are similar to those you followed when verifying your domain.
Again, Google will automatically detect your domain name host and show you specific instructions on how to route your emails to Gmail.
I’ll show you how to do it for Google Domains, but if you’re using a different registrar, just follow Google’s instructions instead.
17. Log in to Google Domains
18. Click “DNS” on the left column
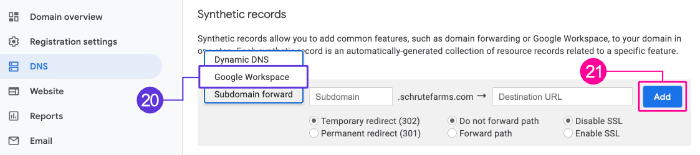
19. Scroll down to the Synthetic records section
20. Select “Google Workspace” from the Subdomain forward dropdown menu
21. Click “Add”
Step 5: Add Google Workspace MX Records
Mail exchange (MX) records are used to tell your incoming email where to go.
Since you want your emails to end up in Google Workspace instead of your web host (or wherever you currently host your email), you must add Google Workspace’s MX records in your DNS manager.
These are Google Workspace MX record values:
| Priority | Value/Destination |
|---|---|
| 1 | aspmx.l.google.com |
| 5 | alt1.aspmx.l.google.com |
| 5 | alt2.aspmx.l.google.com |
| 10 | alt3.aspmx.l.google.com |
| 10 | alt4.aspmx.l.google.com |
How you add these values will depend on where you manage your DNS. This could be Cloudflare, your web host, or your domain name registrar.
To find specific instructions on how to change MX records, you can google the following search term:
Edit MX Records [Your Hosting Company]
Just replace [Your Hosting Company] with your actual hosting company (or wherever you keep your DNS).
In this article, I’ll show you how to change your MX records on NameHero.
How to Change MX Record on NameHero
1. Log in to NameHero Client area
2. Click on the website you want to manage edit DNS for
3. On the left column, click “Login to cPanel”
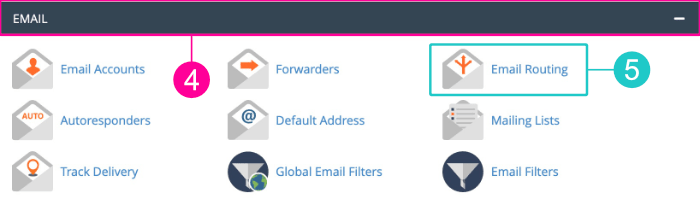
4. Scroll down to the “Email” tab
5. Click “Email Routing”
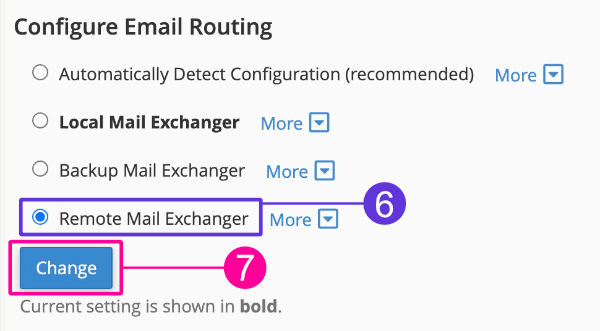
6. Select the “Remote Mail Exchanger” option
7. Click “Change”
8. Go back to cPanel
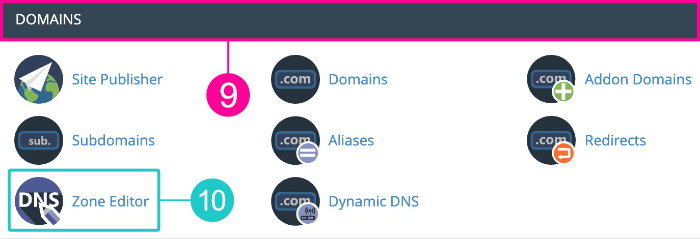
9. Find the “Domains” tab
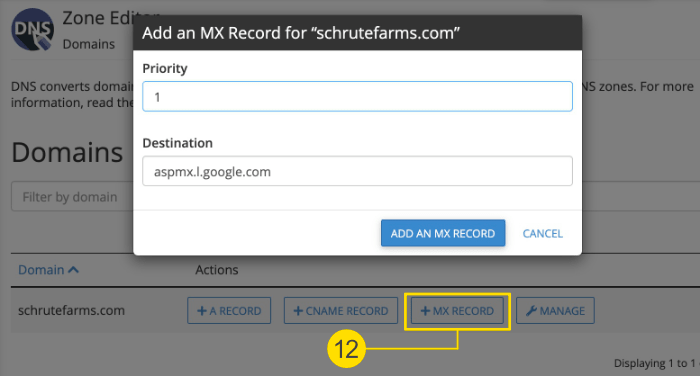
10. Click “Zone Editor”
11. Delete your old MX records, if you have any
12. Click “+ MX Record” to add an MX record
13. Add all five Google Workspace MX record values with their corresponding priority
14. That’s it!
It can take a few minutes, but sometimes up to 48 hours, for changes to propagate.
Final Thoughts: How to Set up Google Workspace
Not only does having an email address with your domain name look more professional, but using a quality email service like Google will increase your chances of having your emails land in your recipients’ inbox instead of their spam folders.
Obviously, this is not a 100% guarantee, but it helps a lot.
Plus, it’s always good practice to keep your email separate from your web host.
If you have any questions about setting up your professional email address with Google Workspace, let me know in the comments section below.
You’re also welcome to join our free Facebook group.